Role: Lead Designer
Duration: 3 weeks
Skills: Industrial Design Sketching, Rhino 7, 3D Printing, Cura, Laser-Cutting
PROJECT SUMMARY:
The goal of this project was to design a lampshade using 3D printing and laser cutting technology in order to familiarize ourselves with the Makerspace and develop an understanding for lighting design. From the start, I was fairly certain I wanted to create a camping and backpacking lantern with a modern and sleek design, since many lanterns are not aesthetically pleasing.
PHASE 1: USER INTERVIEWS
I began my design process by interviewing several individuals who frequently engage with lanterns in order to get a feel for functional needs as well as aesthetic preferences.
I asked users a variety of questions, always starting our interviews with “If you could redesign a lantern, what features would you add?”

PHASE 2: MOOD BOARD & BRAINSTORMING
MOODBOARD
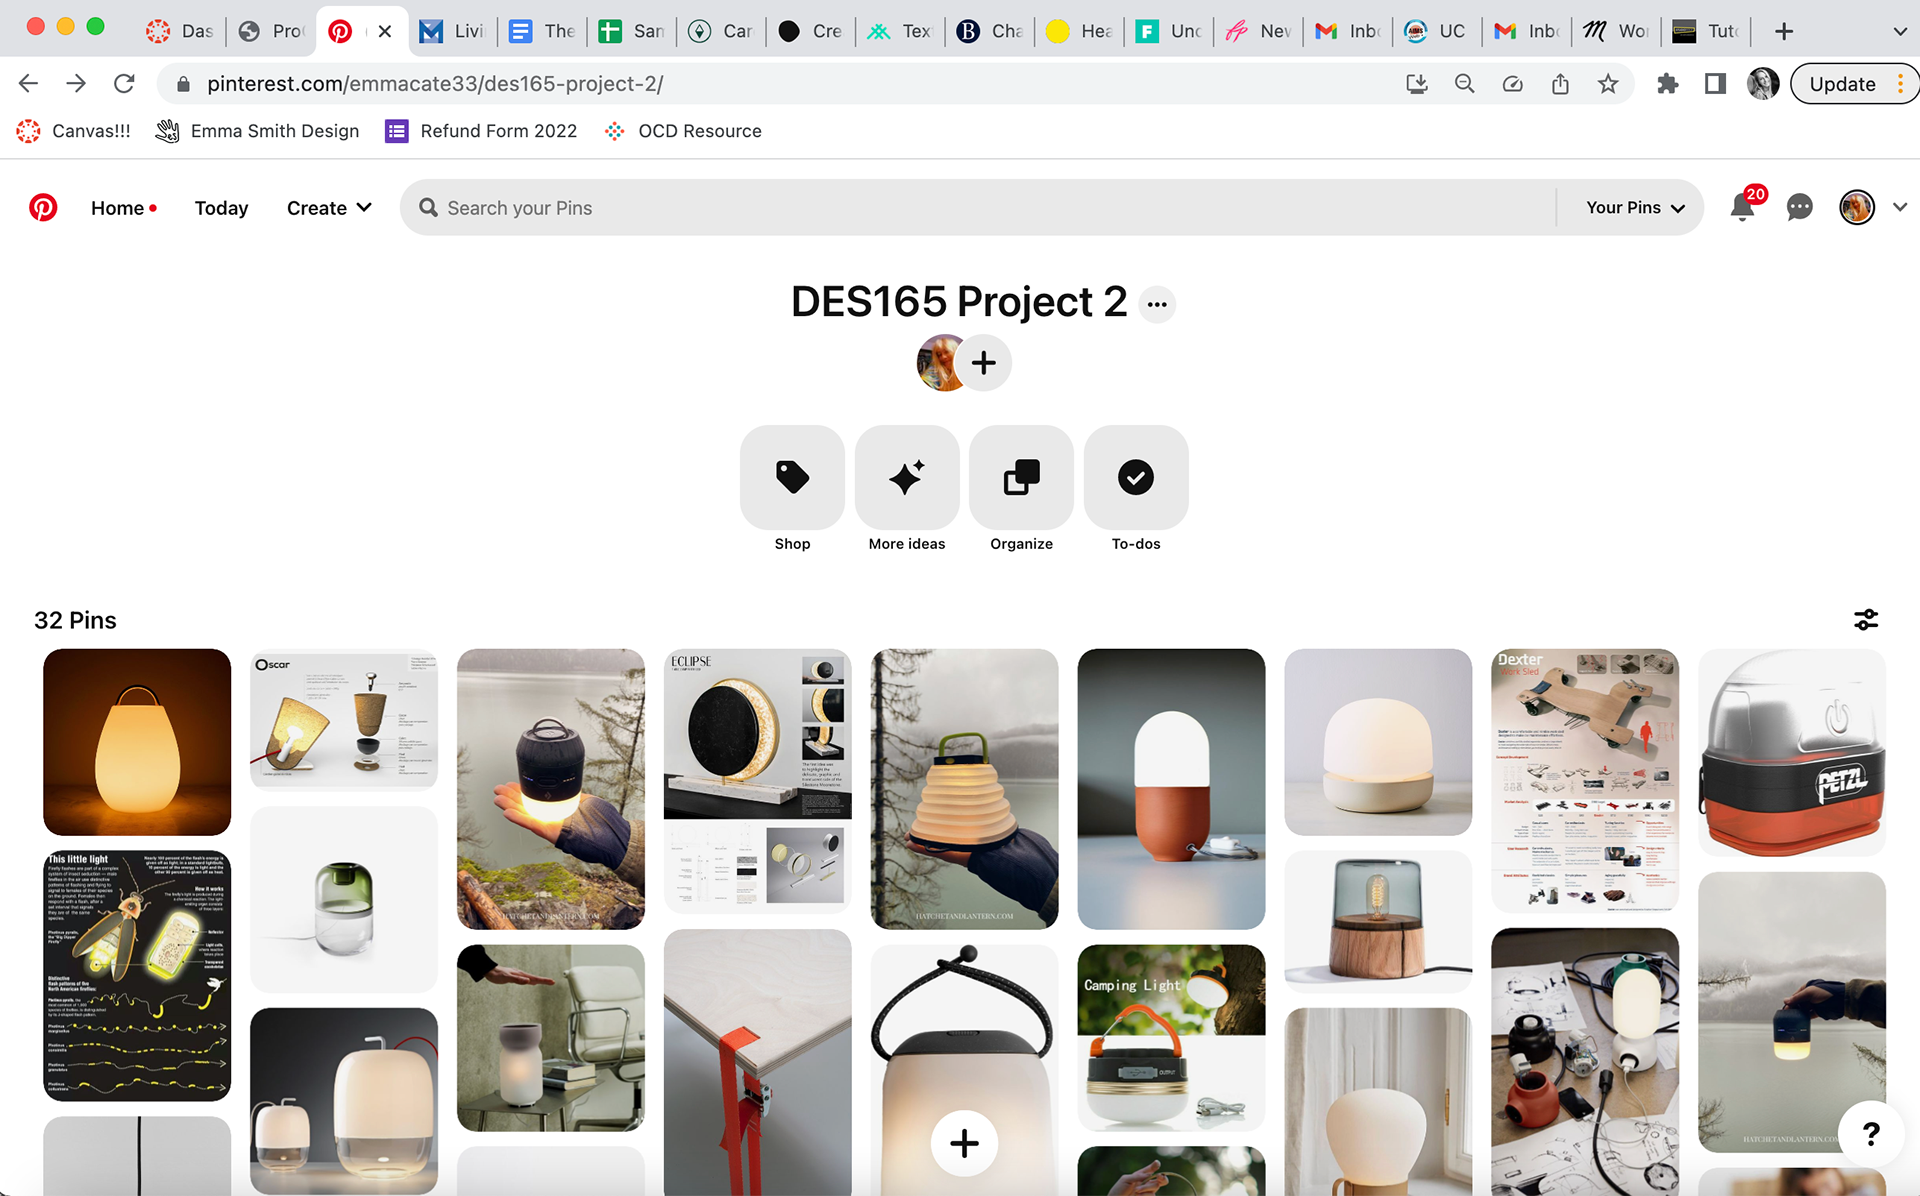
As always, I created a mood board (this time utilizing Pinterest) to gather images that inspired me, as well as examples of lamps and lanterns currently on the market that fall into this niche.
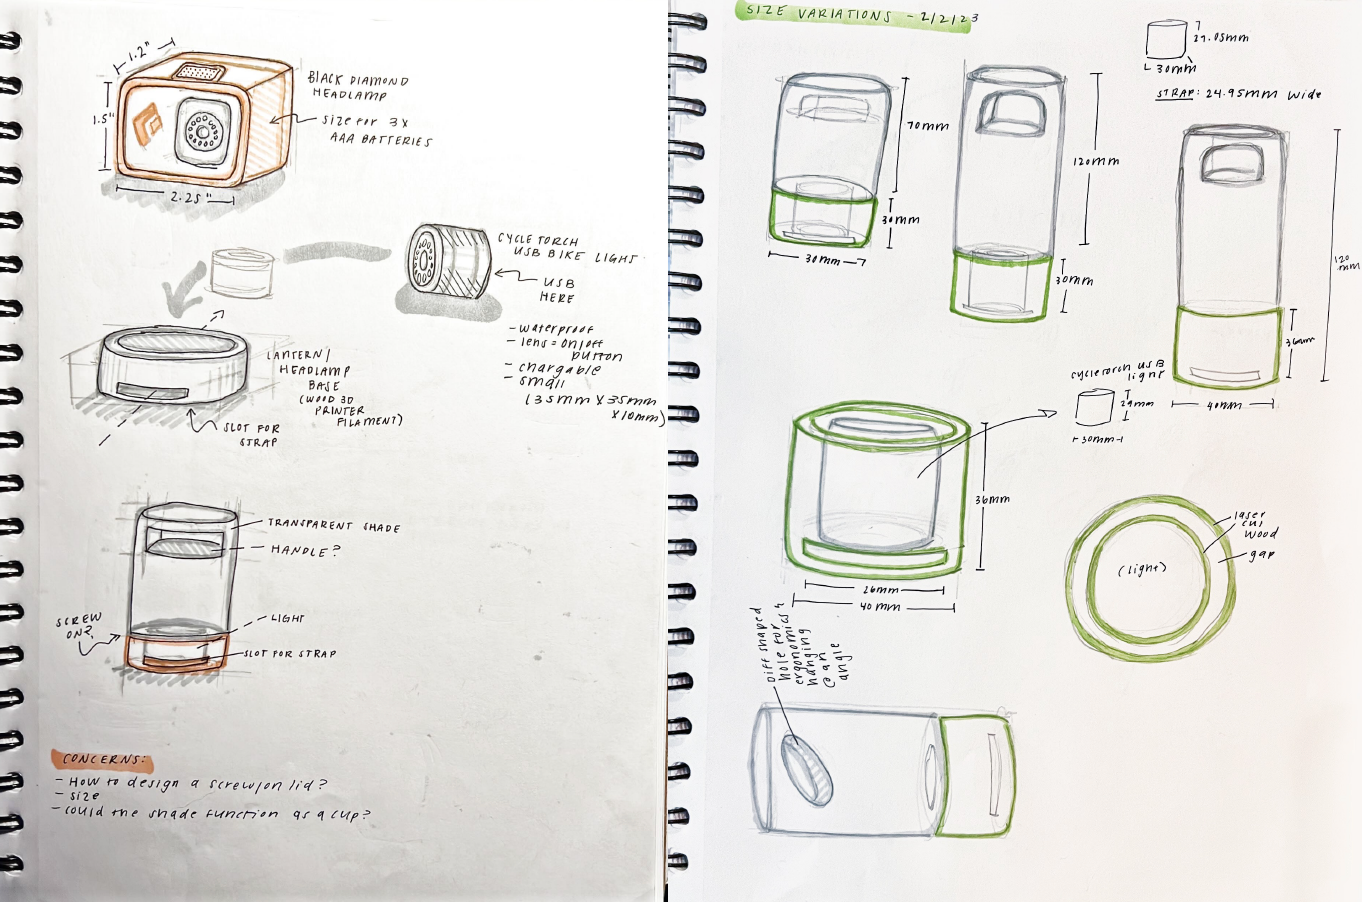
INITIAL SKETCHES
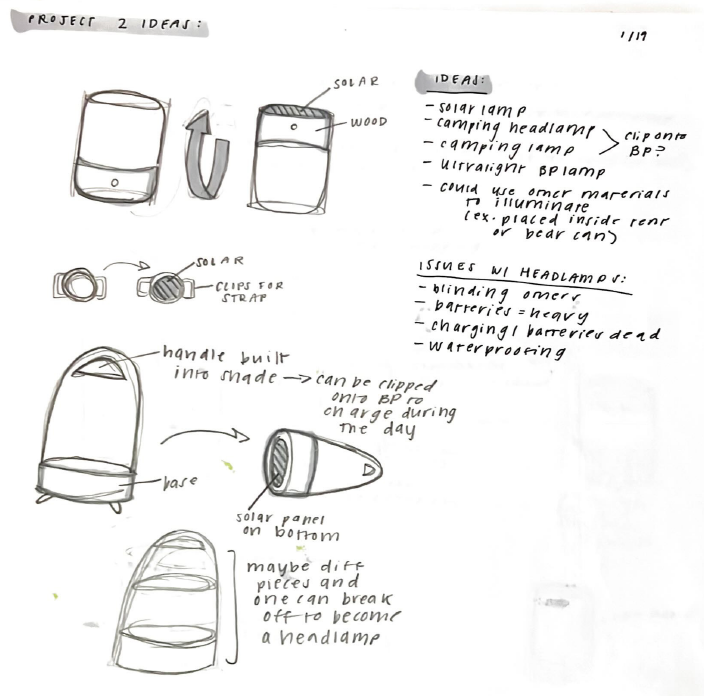
After generating ideas for features that I wanted to include in the lantern based on my user interviews, I did a preliminary round of sketches, playing around with integrating features such as a handle/clip and a solar base.
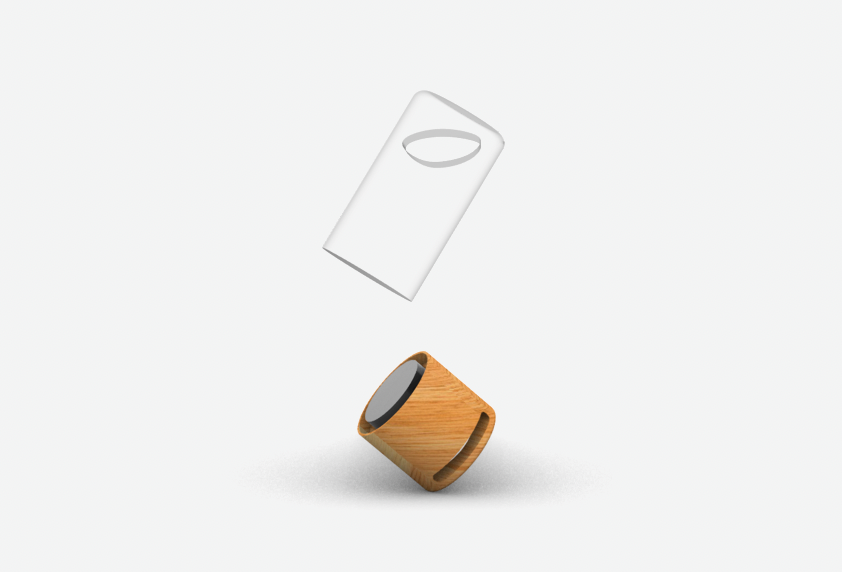
In my second round of sketches, I focused more on developing the shape of the lantern/headlamp and how the pieces would fit together to create a multifunctional piece. Once I came up with a shape I liked, I drew an exploded view to demonstrate my idea more clearly to others, shown below to the right.

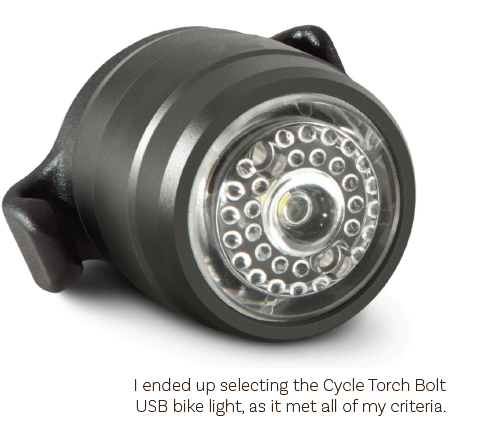
PHASE 3: SELECTING A LIGHT
After some initial sketching, I selected a light to use in my prototype so that I could design my prototype with precise measurements.
When searching online for lights, I looked for:
- Brightness (LEDs)
- Size (less than 2in on all sides)
- USB or solar charging
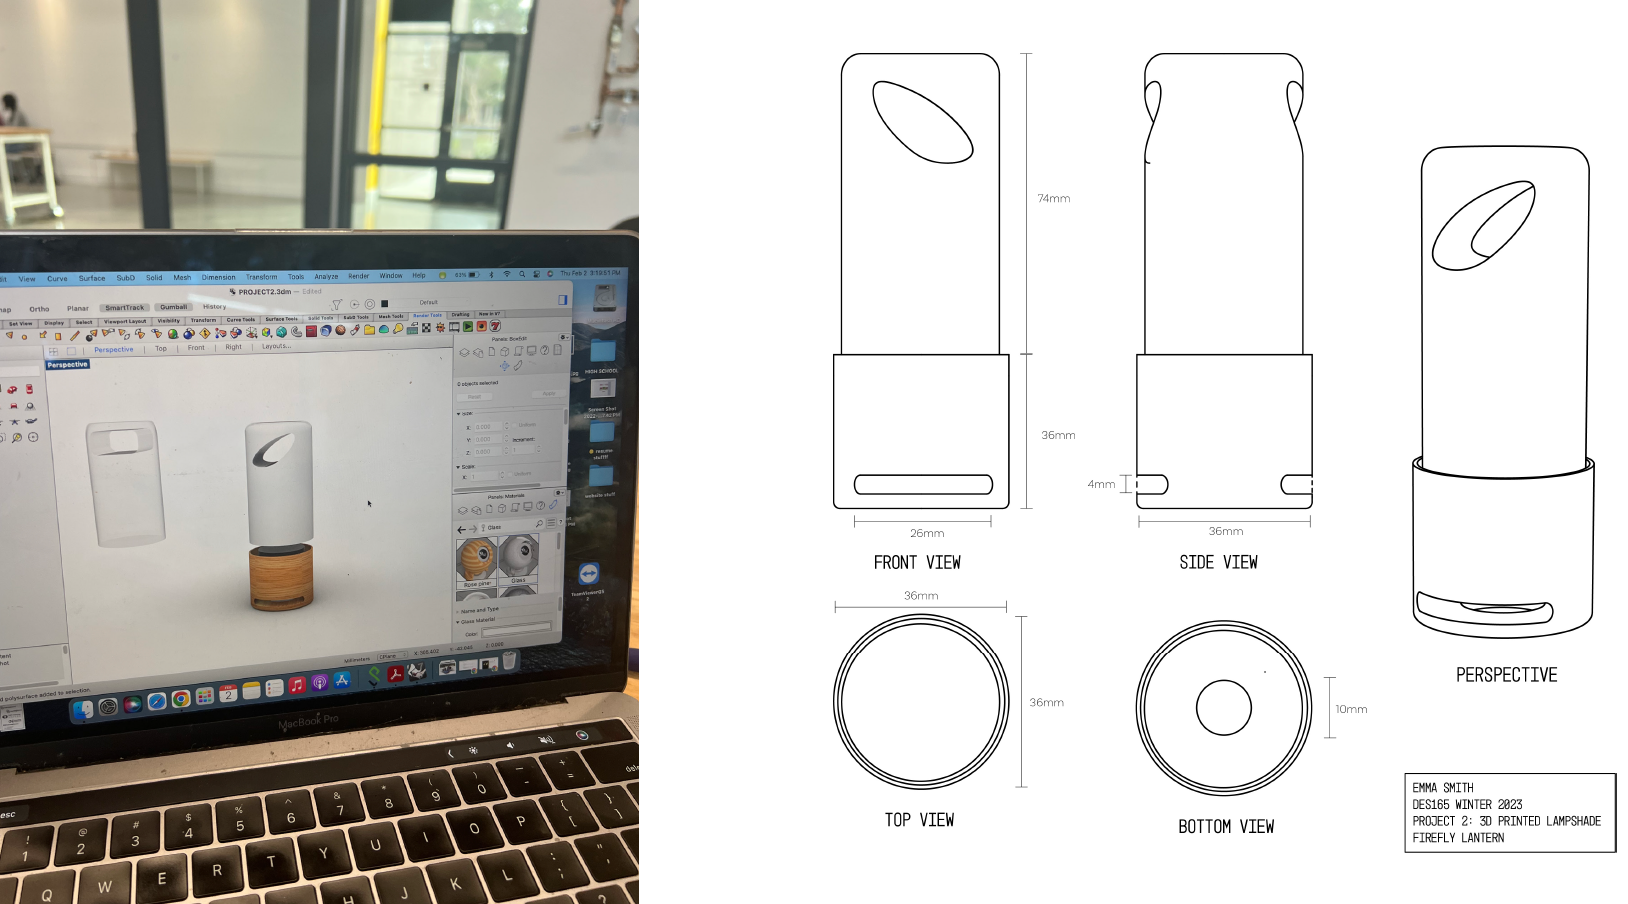
PHASE 4: FINAL SKETCHES
Once I figured out how to incorporate the bike light into my design, I refined my sketches into its final form. These final sketches guided my prototyping process and gave me a clear idea of what I wanted the final product to look like.
PHASE 5: RENDERING IN RHINO 7
Once I decided on a final sketch, I built the design in Rhino 7. I primarily used the cylinder and tube tool, which allowed me to create a symmetrical design. I also used Boolean Difference in order to create the unique handle shape, intended to reflect the shape of a firefly wing. I used Box Edit to ensure that the measurements of the lantern fit the measurements of the bike light to achieve a tight fit.
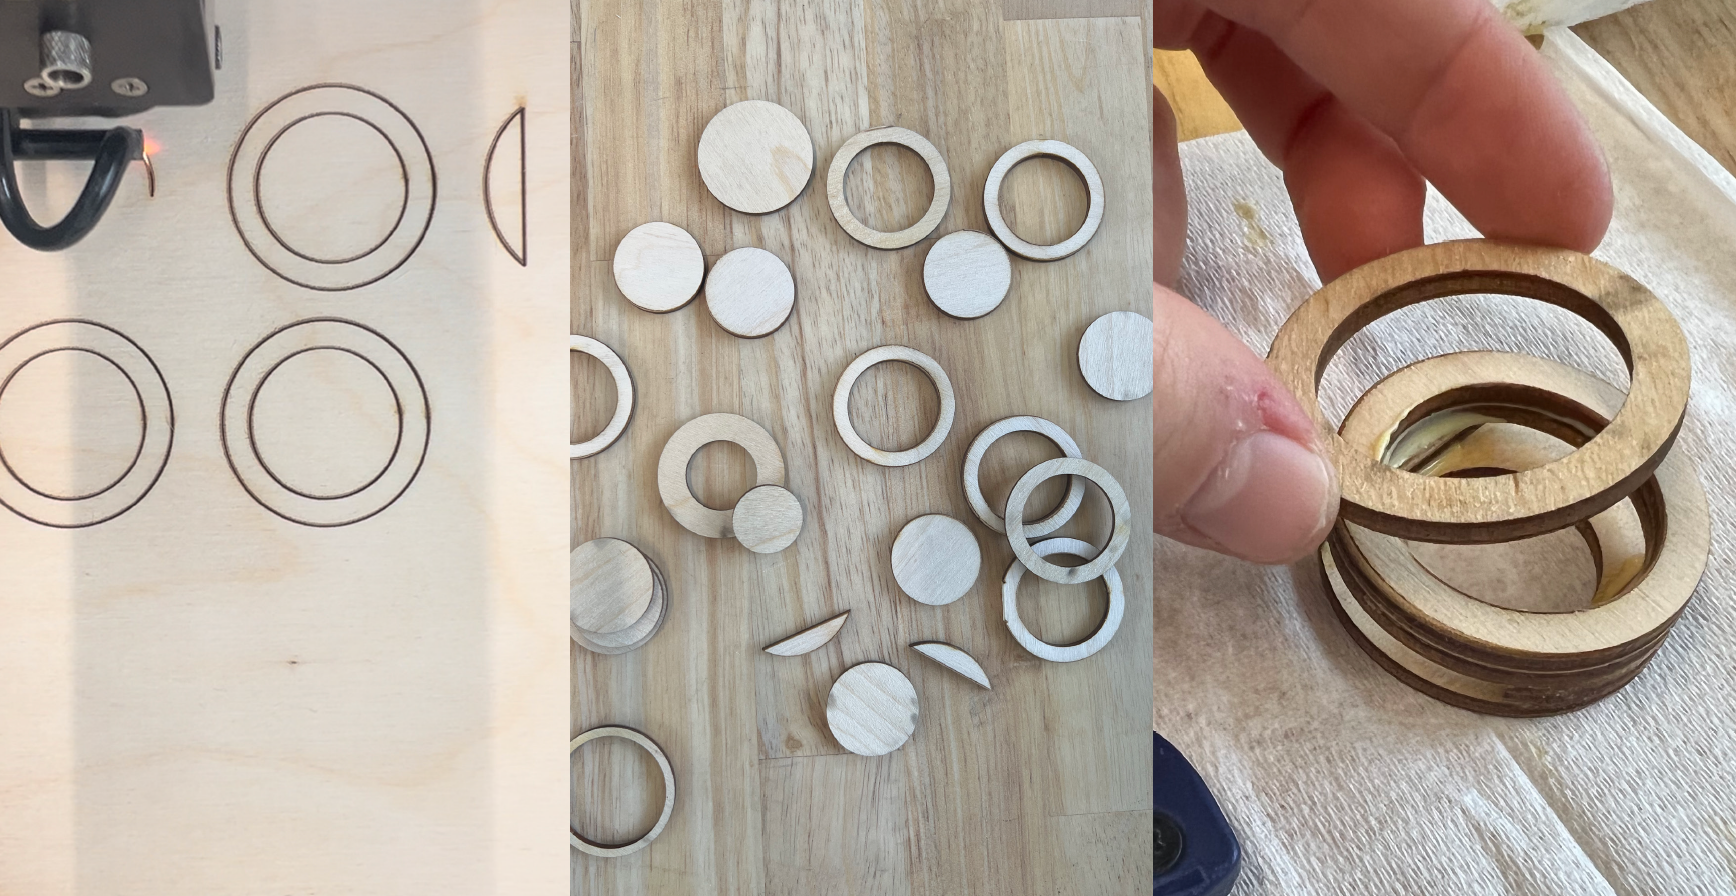
PHASE 6: PROTOTYPING
I began my prototyping process with laser-cutting the base of the lamp. I based my measurements off of the bike light and laser-cut a series of circles which I then stacked, glued, and sanded down to create a base for the light to rest in. I made two different versions of the base, the main difference between the two being the top layer of circles that serve as the connection between the base of the lantern and the lampshade. Finally, I gave the lamp base a light coat of wood stain to deepen the color of the plywood in order to achieve a high-end look.
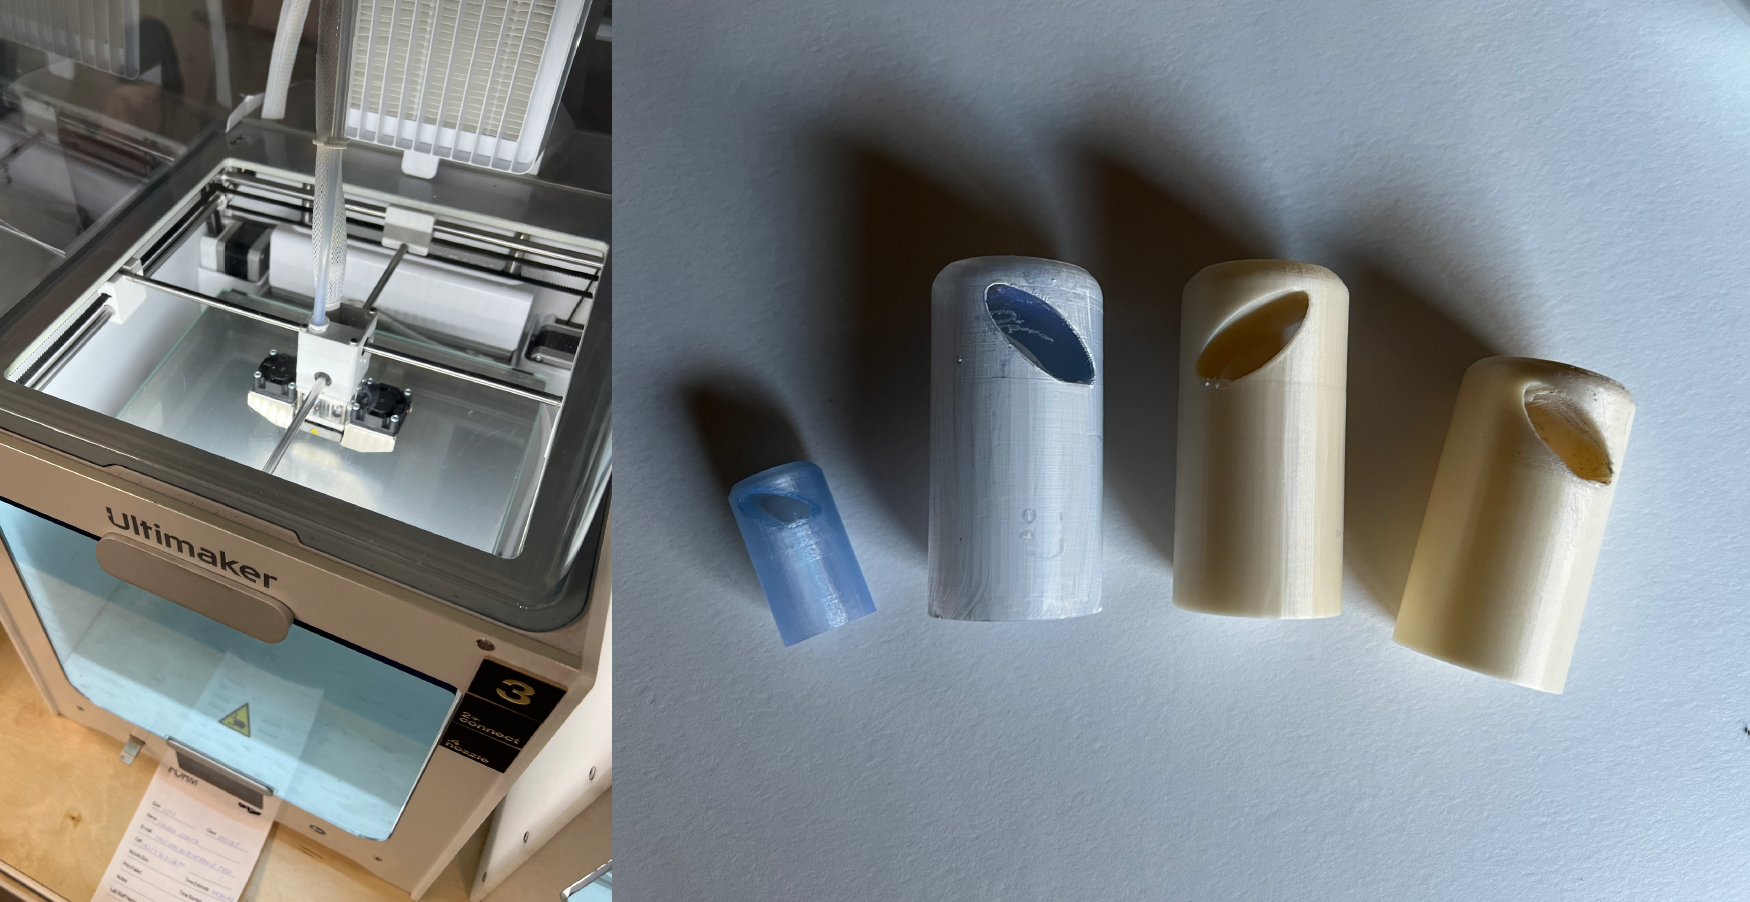
After completing the base of the lantern, I moved on to 3D printing the lampshade using the Ultimaker 2+ Connect. I began with a prototype at 50% scale, which failed initially. I then rotated the design 180 degrees for printing, which was much more successful. I ended up going through about 4 iterations before I had a successful product.
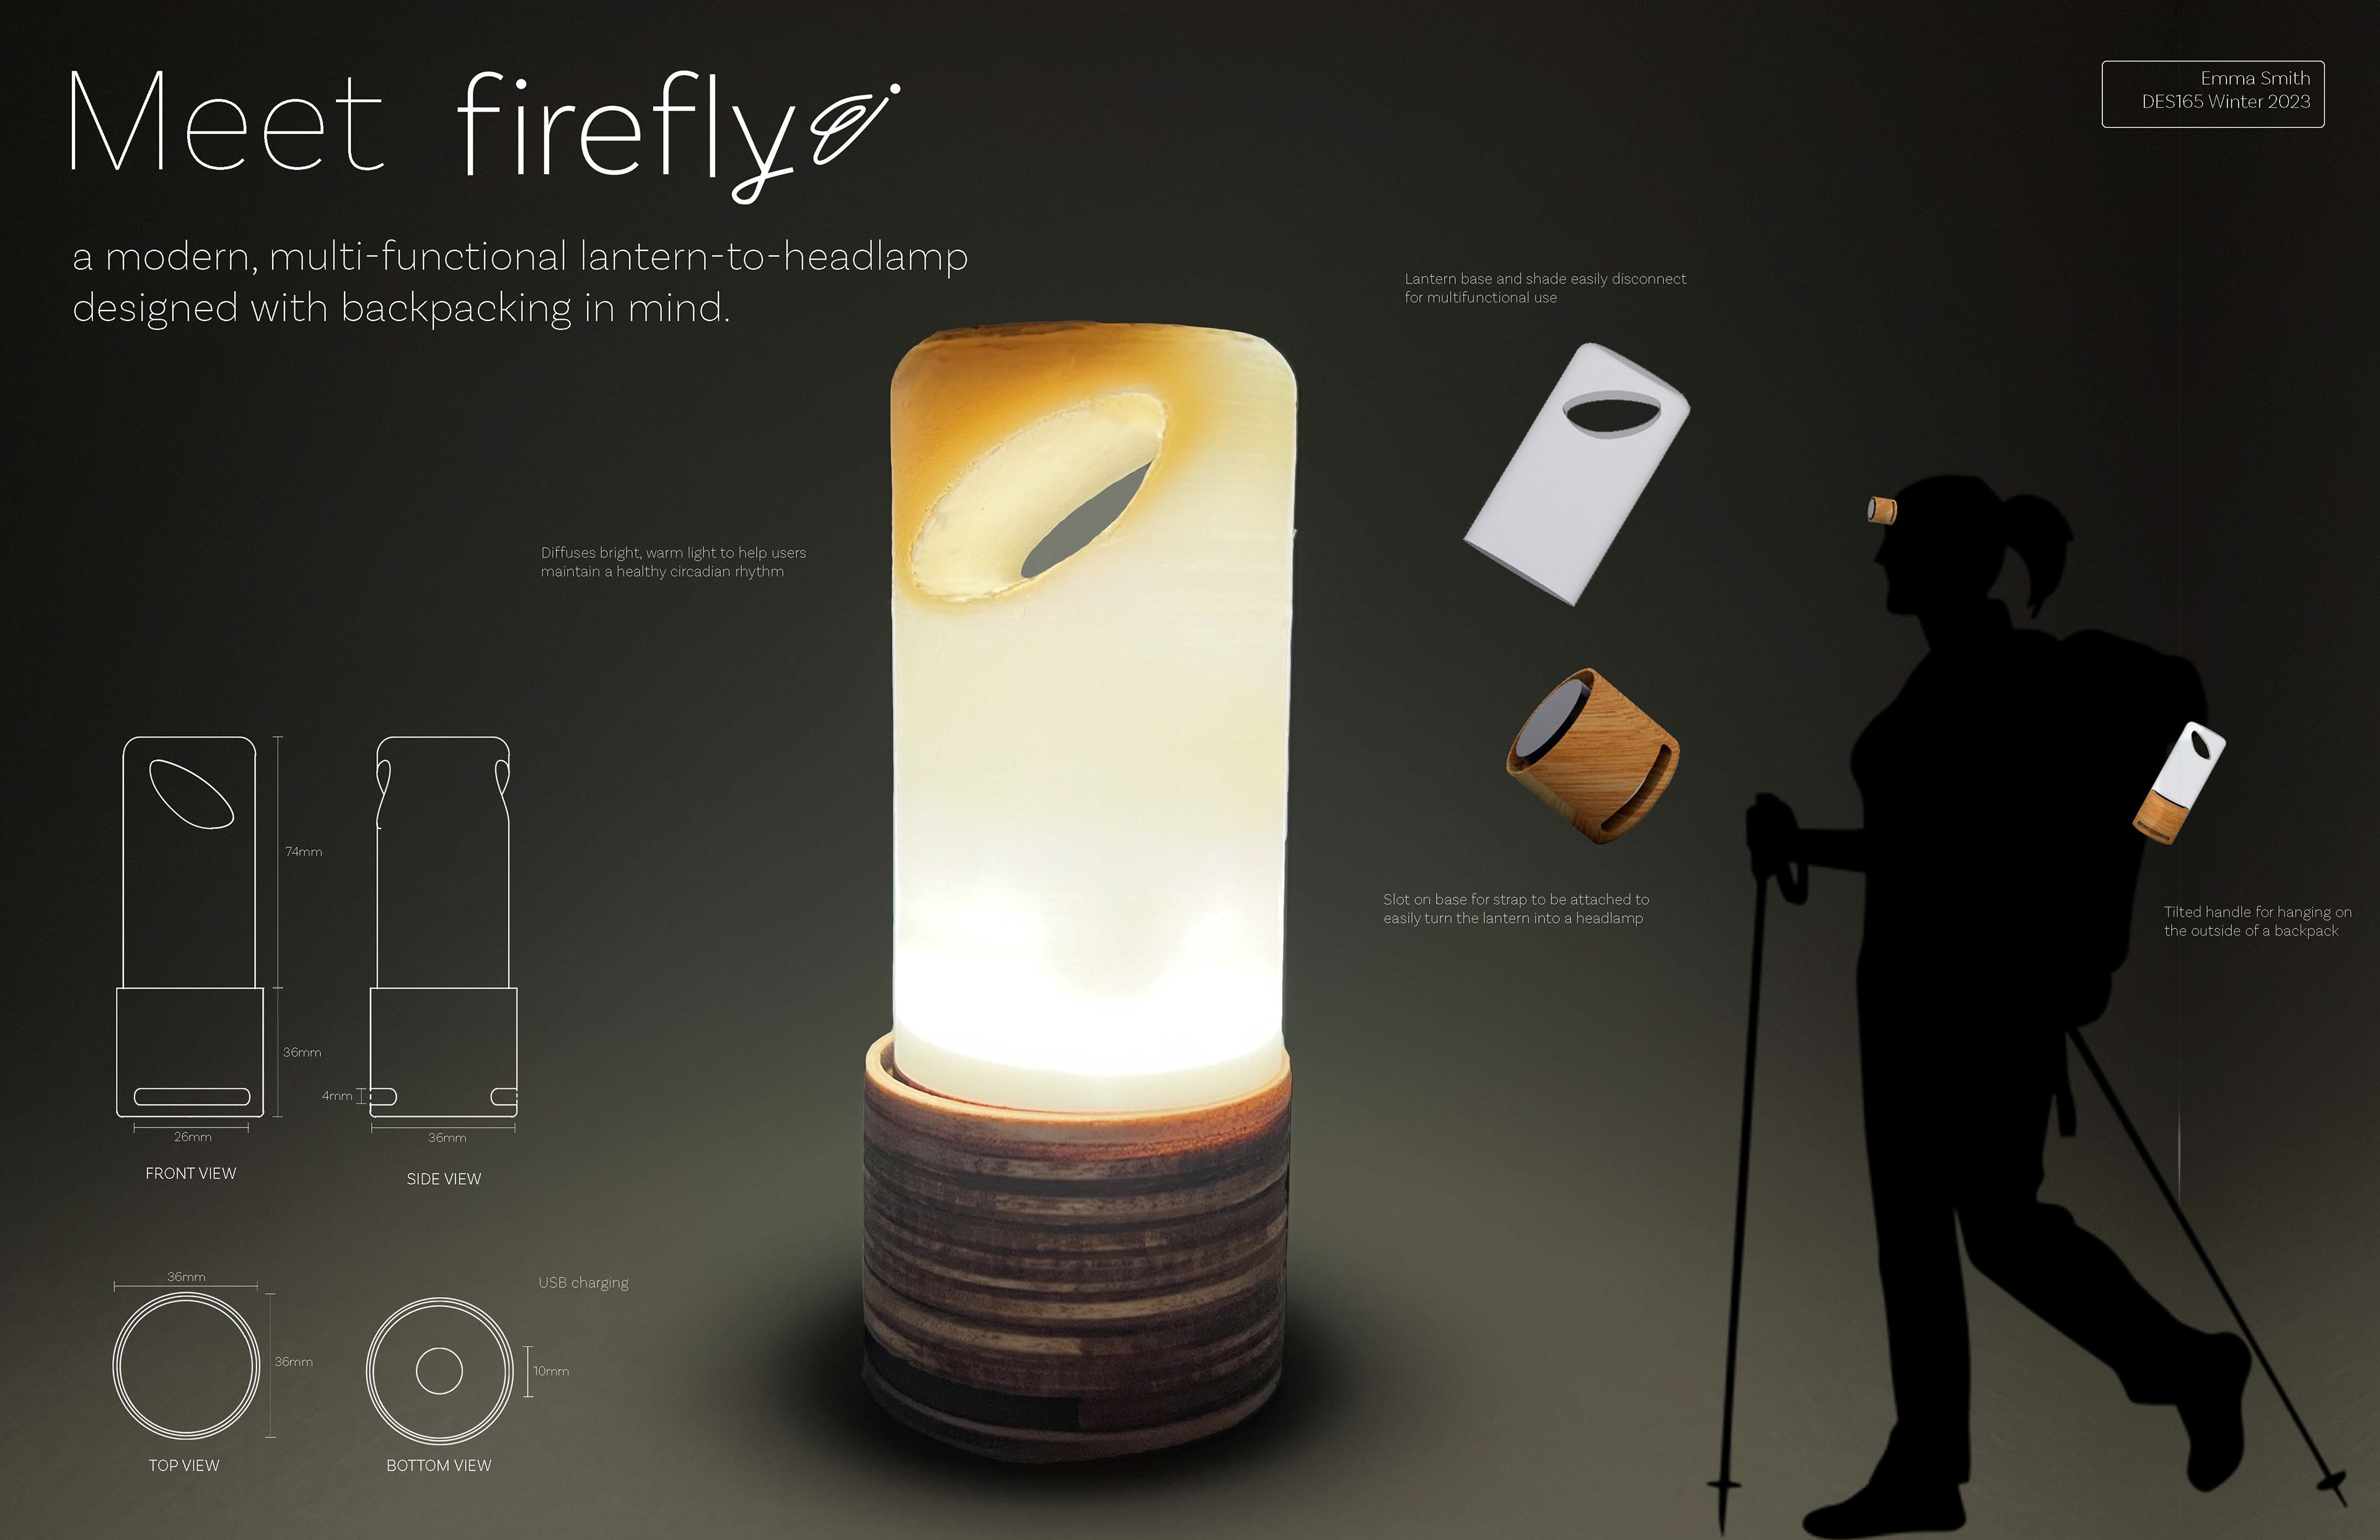
FINAL PROTOTYPE:
After a long prototyping process and overcoming several steep learning curves that come with new technologies, I finally achieved the outcome I was looking for. I ended up using pearl white opaque filament in order to create a softer, warm diffusion of light.
